System-Less Framework: Difference between revisions
New page: This page describes an easy to use framework for developing software for small microcontrollers. First, you have to download a package for the architecture you want to use: * H8S/2638... |
No edit summary |
||
| Line 7: | Line 7: | ||
== Compiling == | == Compiling == | ||
The downloaded packages must be configured for a particular board you plan to use. For ''h8canusb'' execute the following command from h8300-boot directory: | |||
ln -s board/h8canusb/config.h8canusb config.omk | ln -s board/h8canusb/config.h8canusb config.omk | ||
make default-config | make default-config | ||
Then, you can change default configuration of what is compiled by | |||
Then, you can change default configuration of what is compiled by setting the variables from <tt>config.omk-default</tt> to a different value. Since settings from <tt>config.omk</tt> overrides those from <tt>config.omk-default</tt>, it recommended to add the values there. | |||
After typing | After typing | ||
make | make | ||
everything is going to compile and if the compilation is completed without errors, you can use this ''build environment'' for building your own applications. | |||
=== Compiling one application only === | === Compiling one application only === | ||
| Line 20: | Line 21: | ||
To compile only a part of sources (e.g. your own application), change the directory to where your applications resides and run | To compile only a part of sources (e.g. your own application), change the directory to where your applications resides and run | ||
make | make | ||
This will (re)compile | This will (re)compile everything in current directory and all subdirectories. The result of compilation can be found under the <tt>_compiled</tt> direcotry (located at root of h8300-boot directory structure). The structure of <tt>_compiled</tt> directory is as follows: | ||
; bin : binary programs for target system | ; bin : binary programs for target system | ||
| Line 48: | Line 49: | ||
make load | make load | ||
This load the application from current directory to either RAM or FLASH memory. Which one is selected depends on a value of <tt>DEFAULT_LD_SCRIPT_VARIANT</tt> variable. This variable can be set | This load the application from current directory to either RAM or FLASH memory. Which one is selected depends on a value of <tt>DEFAULT_LD_SCRIPT_VARIANT</tt> variable. This variable can be set globally in <tt>config.target</tt> or locally in <tt>Makefile.omk</tt> and the first word of the value of this variable determines the default memory location for loading (and running). | ||
If you want to load an application to different memory location, use one of | If you want to load an application to different memory location, use one of | ||
| Line 65: | Line 66: | ||
You can also combine loading and running to one step and use | You can also combine loading and running to one step and use | ||
make load run | make load run | ||
== Using KDevelop for development == | == Using KDevelop for development == | ||
| Line 93: | Line 88: | ||
TODO: | TODO: | ||
== Additional documentation == | == Additional documentation == | ||
* [http://dce.felk.cvut.cz/dolezilkova/diplomky/2006/dp_2006_stanislav_marek/dp_2006_staniclav_marek.pdf Stanislav Marek's Diploma thesis] - Documentation to OMK build system in Czech. | * [http://dce.felk.cvut.cz/dolezilkova/diplomky/2006/dp_2006_stanislav_marek/dp_2006_staniclav_marek.pdf Stanislav Marek's Diploma thesis] - Documentation to OMK build system in Czech. | ||
Revision as of 17:17, 21 March 2008
This page describes an easy to use framework for developing software for small microcontrollers.
First, you have to download a package for the architecture you want to use:
Compiling
The downloaded packages must be configured for a particular board you plan to use. For h8canusb execute the following command from h8300-boot directory:
ln -s board/h8canusb/config.h8canusb config.omk
make default-config
Then, you can change default configuration of what is compiled by setting the variables from config.omk-default to a different value. Since settings from config.omk overrides those from config.omk-default, it recommended to add the values there.
After typing
make
everything is going to compile and if the compilation is completed without errors, you can use this build environment for building your own applications.
Compiling one application only
To compile only a part of sources (e.g. your own application), change the directory to where your applications resides and run
make
This will (re)compile everything in current directory and all subdirectories. The result of compilation can be found under the _compiled direcotry (located at root of h8300-boot directory structure). The structure of _compiled directory is as follows:
- bin
- binary programs for target system
- bin-utils
- binary programs for host system (PC) (note: This will probably change in future)
- include
- header files which are used when compiling for target
- libs
- compiled libraries for target
There is another directory called _build where intermediate products of compilation such as object files, linker maps and dependency descriptions are stored. You can delete files in _build corresponding to your application by issuing
make clean
If you want to delete both _compiled and _build directories, run
make distclean
Using non-default link variant
If your board has it's default link variant set for example to ram and you want to link your application for flash memory, you can use the following command to compile another variant of your program:
make link_VARIANTS=flash
You can use more variant at once by
make link_VARIANTS="flash ram"
Loading and running an application
To load an application to the target processor, run
make load
This load the application from current directory to either RAM or FLASH memory. Which one is selected depends on a value of DEFAULT_LD_SCRIPT_VARIANT variable. This variable can be set globally in config.target or locally in Makefile.omk and the first word of the value of this variable determines the default memory location for loading (and running).
If you want to load an application to different memory location, use one of
make load-flash
make load-ram
If there are more programs to load in the current directory, and you want to load a non-default one, you have to run
make load-<progname>-ram
make load-<progname>-flash
After loading your application, you can run it by running one of the following
make run
make run-ram
make run-flash
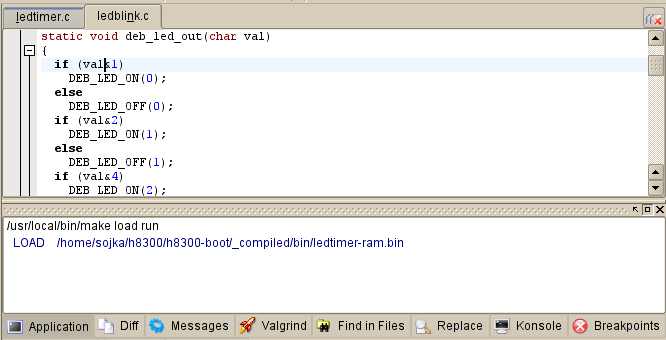
You can also combine loading and running to one step and use
make load run
Using KDevelop for development
KDevelop is very good IDE for developing various kind of applications. It can be easily used to develop software for H8300 processors and can be well integrated with OMK make-system.
If you want to use KDevelop for development, follow theese points:
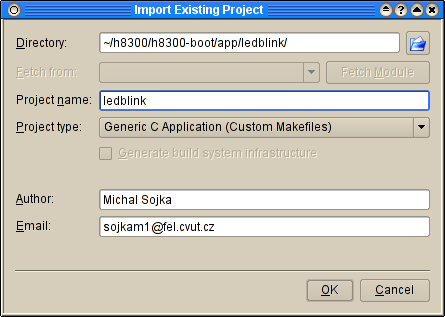
- Import project to KDevelop (from menu choose Project -> Import existing project). Select the type of project to Generic C Application (Custom Makefile)
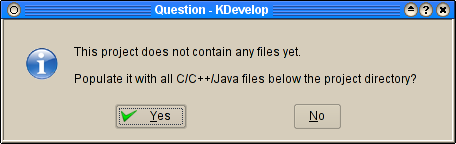
- (Optional) Populate your project with source files by anwering yes to the dialog.
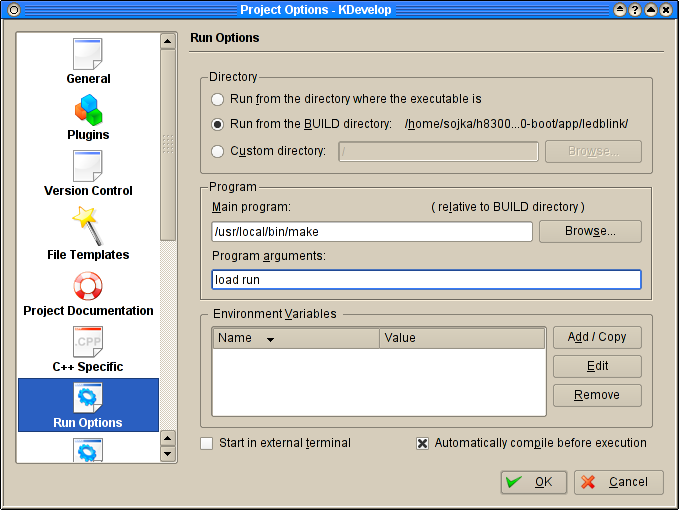
- Open Project Options dialog (menu Project -> Project Options) and choose Run Options. Select Run from the BUILD directory, to Main Program editbox write /usr/local/bin/make (you may have your make in a different directory) and as Program Arguments write load run.
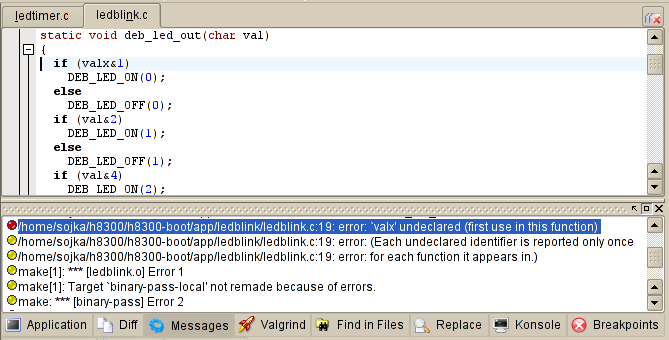
- Now you can compile your application by pressing F8 and if there are some errors, you can quickly jump the place in source whre the error is by pressing F4.
- After successfull compilation you can run your application by clicking Execute program icon. I recomend you to create shortcut key F9 for this action. If you change your sources, you can booth recompile and execute your application by simply pressing F9.


If you run
make TAGS
in any direcotry, the file TAGS in the toplevel directory of the project will be created. This file can be used by various editors (such as Emacs) for quick searching of symbols in source files.
Writing your own application
TODO:
Additional documentation
- Stanislav Marek's Diploma thesis - Documentation to OMK build system in Czech.