H8300-boot: Difference between revisions
| Line 148: | Line 148: | ||
=== Serial Communication === | === Serial Communication === | ||
You have to include | |||
#include <periph/sci_rs232.h> | |||
then initialize the needed serial ports: | |||
/* Initialize SCI channels 0 and 1 */ | |||
sci_rs232_setmode(19200, 0, 0, 0); | |||
sci_rs232_setmode(19200, 0, 0, 1); | |||
Then you can use: | |||
sci_rs232_sendch('H', 0); | |||
to send characters. | |||
You can also use <tt>printf()</tt> and similar functions. The output of theese will go to the serial port specified by <tt>sci_rs232_chan_default</tt> variable. Its default value is selected in <tt>system_def.h</tt> and can be different for every board. | |||
For examples see [http://rtime.felk.cvut.cz/darcs/darcsweb.cgi?r=h8300-boot;a=tree;f=/app/rs_test app/rs_test/*.c] | |||
Revision as of 13:26, 1 December 2006
Getting the software
Actual source code can be downloaded using a Darcs tool:
darcs get http://rtime.felk.cvut.cz/repos/h8300-boot
This will create a copy of the repository on your computer. You can upgrade your repository using the command:
darcs pull
If you have an acount on the rtime server, you can use ssh-based access to the repository. If an administrater gave you the right for writing to the repository, you can not only read (pull) repository but also write (push) changes to the repository.
The syntax for getting the repo is:
darcs get <login>@rtime.felk.cvut.cz:/var/repos/h8300-boot
Browsing of project sources is also possible via Darcs web interface.
If you plan to record some changes and push them back to the server, it is recomended to add the following lines to _darcs/prefs/boring:
^TAGS$
^config\.omk
^_build
^_compiled
Compiling
First, you have to configure the make-system for a board you plan to use. For h8canusb execute the following command from h8300-boot directory:
ln -s board/h8canusb/config.h8canusb config.omk
make default-config
Then, you can change default configuration of what is compiled by copying config.omk-default to config.omk. In the copied file change default configuration as you want and delete other lines you want to have default value.
After typing
make
everithing is goning to compile and if the compilation is completed without errors, you can use this build environment for building your own applications.
Compiling one application only
To compile only a part of sources (e.g. your own application), change the directory to where your applications resides and run
make
This will (re)compile everithing in current directory and all subdirectories. The result of compilation can be found under the _compiled direcotry (located at root of h8300-boot directory structure). The structure of _compiled directory is as follows:
- bin
- binary programs for target system
- bin-utils
- binary programs for host system (PC) (note: This will probably change in future)
- include
- header files which are used when compiling for target
- libs
- compiled libraries for target
There is another directory called _build where intermediate products of compilation such as object files, linker maps and dependency descriptions are stored. You can delete files in _build corresponding to your application by issuing
make clean
If you want to delete both _compiled and _build directories, run
make distclean
Using non-default link variant
If your board has it's default link variant set for example to ram and you want to link your application for flash memory, you can use the following command to compile another variant of your program:
make links_VARIANTS=flash
You can use more variant at once by
make links_VARIANTS="flash ram"
Loading and running an application
To load an application to the target processor, run
make load
This load the application from current directory to either RAM or FLASH memory. Which one is selected depends on a value of DEFAULT_LD_SCRIPT_VARIANT variable. This variable can be set globaly in config.target or locally in Makefile.omk and the first word of the value of this variable determines the default memory location for loading (and running).
If you want to load an application to different memory location, use one of
make load-flash
make load-ram
If there are more programs to load in the current directory, and you want to load a non-default one, you have to run
make load-<progname>-ram
make load-<progname>-flash
After loading your application, you can run it by running one of the following
make run
make run-ram
make run-flash
You can also combine loading and running to one step and use
make load run
Bootstrapping the processor
In order to be able to load applications to the target system, there have to be a bool loader program in processor's FLASH memory. The loader program is located at app/bloader directory and you can load it to the processor by
sh bootstrap
from bloader direcotry.
Using KDevelop for development
KDevelop is very good IDE for developing various kind of applications. It can be easily used to develop software for H8300 processors and can be well integrated with OMK make-system.
If you want to use KDevelop for development, follow theese points:
- Import project to KDevelop (from menu choose Project -> Import existing project). Select the type of project to Generic C Application (Custom Makefile)
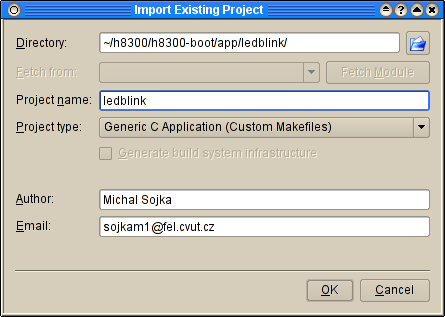
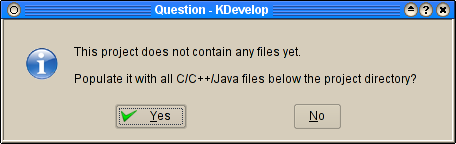
- (Optional) Populate your project with source files by anwering yes to the dialog.
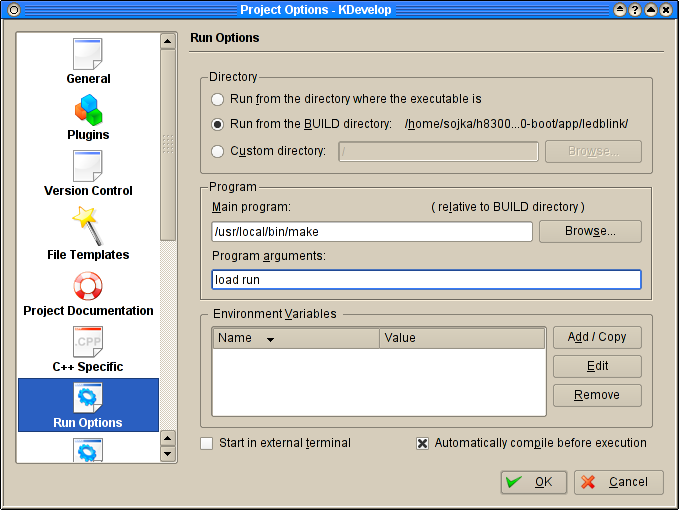
- Open Project Options dialog (menu Project -> Project Options) and choose Run Options. Select Run from the BUILD directory, to Main Program editbox write /usr/local/bin/make (you may have your make in a different directory) and as Program Arguments write load run.
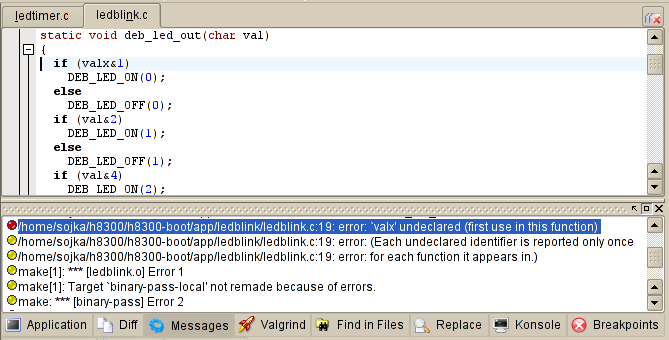
- Now you can compile your application by pressing F8 and if there are some errors, you can quickly jump the place in source whre the error is by pressing F4.
- After successfull compilation you can run your application by clicking Execute program icon. I recomend you to create shortcut key F9 for this action. If you change your sources, you can booth recompile and execute your application by simply pressing F9.


If you run
make TAGS
in any direcotry, the file TAGS in the toplevel directory of the project will be created. This file can be used by various editors (such as Emacs) for quick searching of symbols in source files.
Writing your own application
TODO:
Interrupts
Interrupts are disabled by default. If you wand to use interrupts in your application you have to enable them explicitly by
sti();
Interrupts handling mechanisms are initialized by calling excptvec_initfill and particular interrupts are setup by calling excptvec_set. For example see the code bellow.
void  no_isr(void) __attribute__ ((interrupt_handler));
void  no_isr(void) {};

void my_isr(void)
{
    /* some code */
}

int main()
{
    // all the interrupts will run no_isr
    excptvec_initfill(no_isr, 0);

    // set the interrupt handler my_isr to the interrupt vector
    // number 42
    excptvec_set(42, my_isr);

    /* Enable interrupts which are disabled by default. */
    sti();
    ...
}
When linking your program you need to link it with library excptvec. So in your Makefile.omk you will need a line similar to
yourprogram_LIBS = excptvec
Serial Communication
You have to include
#include <periph/sci_rs232.h>
then initialize the needed serial ports:
   /* Initialize SCI channels 0 and 1 */
   sci_rs232_setmode(19200, 0, 0, 0);
   sci_rs232_setmode(19200, 0, 0, 1);
Then you can use:
sci_rs232_sendch('H', 0);
to send characters.
You can also use printf() and similar functions. The output of theese will go to the serial port specified by sci_rs232_chan_default variable. Its default value is selected in system_def.h and can be different for every board.
For examples see app/rs_test/*.c